

First decide: manual or AI?
There are two families of background remover and they are good at opposite things. Picking wrong is why people end up frustrated.
Manual tools win when…
- the background is a flat colour or a simple gradient
- it is a logo, icon, screenshot, or clip art
- it is a product shot on white or in a lightbox
- it is a scanned signature or document
- you need the edge to be exactly where you say it is
AI tools win when…
- the subject is a person against a real scene
- there is hair, fur, or fine translucent detail
- the background is visually busy and varied
- you have many photos and need speed over precision
Roughly speaking: if you could describe the background as “the white part” or “the blue part”, a magic wand will beat any AI, instantly and for free. If you would have to describe it as “everything that is not my friend standing in a park”, use AI and accept the upload.
Where the manual wand runs out
Both panels below came out of our own editor, so this is the real ceiling rather than a flattering mock-up. The shoulders cut cleanly against a flat backdrop; the hair does not, because individual strands blend into the background and no colour-distance fill can separate a pixel that is genuinely half hair and half backdrop. That is the case where a paid AI matting service earns its money.


The four-step manual workflow
- 1Load the image. Drop a PNG, JPG, or WebP into the editor. A checkerboard pattern shows behind it so you can see transparency as it appears.
- 2Wand the background. Click it once. Everything connected and similar in colour disappears. This single click does most of the work on a flat background.
- 3Tune the tolerance and repeat. Too little vanished? Raise the tolerance. Part of your subject vanished? Undo with Ctrl+Z and lower it. Two or three iterations lands it.
- 4Clean up and export. Erase stray fringes with the brush, paint back over-cuts with the restore brush, then download a transparent PNG.
Understanding tolerance — the one setting that matters
Tolerance decides how different a pixel is allowed to be from the one you clicked and still count as background. Everything else about magic wand selection follows from it.
| Tolerance | Good for |
|---|---|
| 10–20 | Pure flat colour: PNG exports, screenshots, vector art |
| 25–35 | Clean photographs and scans, mild compression |
| 35–50 | JPEGs with visible halos, uneven studio lighting, paper shadows |
| 50+ | Gradient backdrops — expect to fix the subject edge by hand |
There is also a contiguous switch. Left on, a click only clears the connected patch you clicked. Turned off, it clears that colour everywhere in the image at once — which is how you get white out of the middle of the letter O in a logo without clicking each hole individually.
The one tolerance can never solve
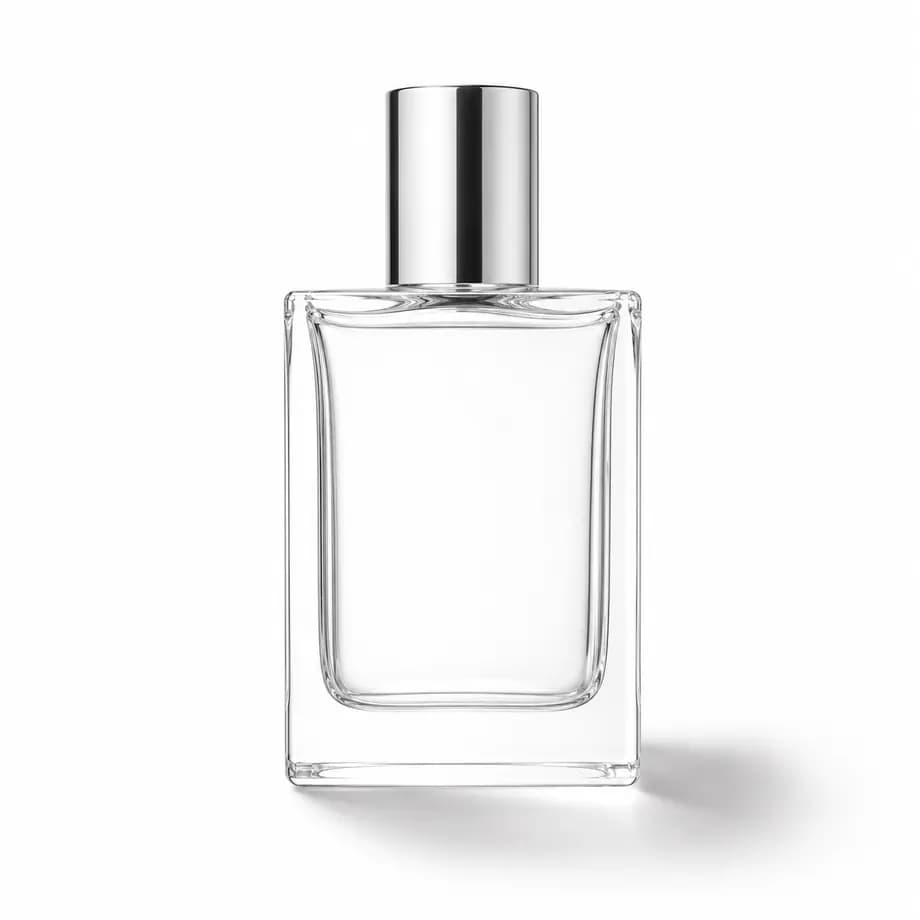
Transparent glass and soft drop shadows break the premise. A magic wand asks one question — is this pixel close enough in colour to the one I clicked? — and a pixel inside the bottle is genuinely the same white as the backdrop showing through it.
No tolerance value separates them, because there is nothing to separate: the information is not in the image. Low tolerance keeps the backdrop, high tolerance hollows out the bottle. Draw the outline with the eraser and restore brushes instead, or accept a shadow that fades rather than one that cuts.
Fixing the white fringe
This is the single most common complaint about cut-outs, and it is almost always JPEG compression rather than the tool. JPEG saves space by blending neighbouring pixels, so the boundary between your subject and a white background becomes a thin band of light grey that is not white enough to be selected at a low tolerance. When you drop the result onto a dark background, that band shows up as a glowing outline.
The fix is a sequence, not a single setting: raise the tolerance until the band is included, run the erase brush at a small size over anything left on curves, then apply one or two pixels of edge feathering so the boundary is a soft transition rather than a hard staircase. If you have access to the original PNG rather than a JPEG, use that instead — the problem disappears entirely.
A note on privacy. Most background removers upload your image so their model can run server-side. For a holiday snapshot nobody cares. For a client logo under embargo, an unreleased product photo, a scanned ID, or your handwritten signature, it is worth asking where the file goes and how long it stays. A browser-only editor sidesteps the question: there is no upload to reason about.
Frequently asked questions
What is the easiest way to remove a background from an image?
If the background is a flat colour — white, a studio backdrop, a solid screenshot fill — the fastest route is a magic wand tool: click the background once and every connected pixel of that colour is erased. That is a two-second job. If the background is a busy photograph and the subject is a person, an AI cut-out tool will be faster, because tracing hair by hand is genuinely tedious.
Do I need Photoshop to remove a background?
No. Photoshop is excellent but it is a subscription and a large install for what is often a thirty-second task. A browser-based editor with a magic wand, an erase brush, and transparent PNG export covers the overwhelming majority of background-removal jobs without either cost.
Why does my cut-out have a white or grey fringe around it?
Because of JPEG compression. The encoder blends the boundary between subject and background into a band of in-between pixels that are not quite background colour, so a low-tolerance selection leaves them behind. Raise the tolerance so those transitional pixels are included, then add one or two pixels of edge feathering so the remaining boundary looks soft rather than jagged.
Is it safe to use an online background remover?
It depends entirely on whether the tool uploads your image. Most do — the AI model runs on their servers, so your photo is transmitted and may be retained under their privacy policy. That is a real consideration for client work, unreleased products, ID documents, and signatures. A browser-only tool does the processing locally and never transmits the file, which removes the question altogether.
What file format should I save a transparent image as?
PNG. It is the widely supported format that stores an alpha channel, which is what transparency actually is. JPG cannot store transparency at all — saving a cut-out as JPG will fill the transparent area with white. WebP also supports alpha and produces smaller files, but PNG remains the safest choice for compatibility.
How do I remove the background from a logo with white inside the letters?
Use a non-contiguous (global) selection mode. A normal magic wand click only erases the connected region you clicked, so white trapped inside the counters of letters like O, A, and R survives. Switching off contiguous mode erases every pixel of that colour across the whole image, which clears the enclosed areas in the same click.
Related guides
Try it on your own image
Free, unlimited, no signup, no watermark — and the image never leaves your browser.
Open the background remover